Irises - features of the autumn transplant
Irises are quite common in household plots. They are incredibly beautiful and are great for composing various compositions in flower beds and rock gardens. To preserve their decorative qualities, flowers need care, part of which is the need to transplant them to another place in the fall.

Irises - features of autumn transplant
Why transplant
The need for the procedure is due to the peculiarities of the growing season of Irises.
Every 3-4 years it is required to remove old roots, which will allow the bush to actively develop and bloom. Otherwise, decorative qualities will noticeably decrease already in the 5th year of life.
Optimal timing
The question of when to transplant - in spring or autumn - is always relevant.
The best time to transport Irises to a new location is early autumn. This is due to the fact that after flowering, the plant has enough strength and time for further rooting.
In addition, the activity of insects is reduced, to which flowers are especially susceptible in the first days after the procedure.
The ideal option is to wait for the moment when the buds get stronger, and the rhizome will greatly increase the mass.
The end of the active growth phase falls on the second half of August, transplanting is allowed until mid-October.
At a later time, it is not recommended to carry out work, their consequence will be the death of the plant or low decorative characteristics and poor development.
Lunar calendar
In 2019, the most favorable days for transplanting Irises in September fall on 4-6 and 27-29, in October - on 2-8, 25-31.
By region
For complete rooting in a new area, the bush needs at least 1.5 months from the moment the seed is embedded in the ground.
Therefore, it is very important to take into account the climatic conditions in relation to the regions:
- The Leningrad Region is characterized by an early setting of low temperatures, and therefore the optimal time for planting a flower is at the end of July or August.
- In the Moscow region, the procedure should be carried out in the fall by mid-September.
- In Siberia, you need to cope with gardening work throughout September, because the air temperature is rapidly decreasing from the second half of October.
- In Belarus, the transplant is carried out starting from mid-October.
- In Ukraine, the most favorable period is determined relative to the location of the site. This is due to the very noticeable differences in climatic conditions between the southern and northern parts.
Transplant methods
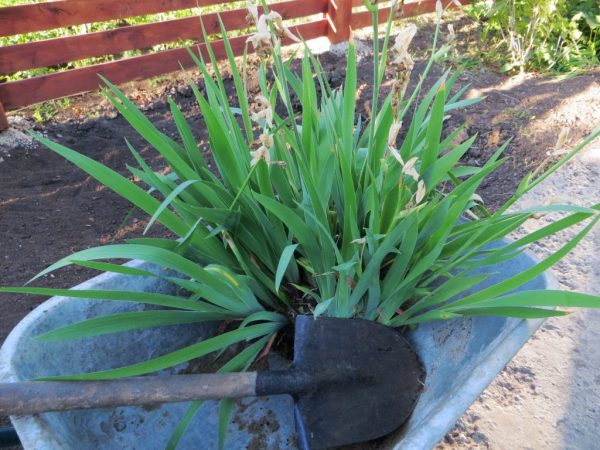
The first option is to dig out the bush completely, the second involves dividing it directly into the ground. To do this, cut the underground part with a sharp knife, dig out the layers with a shovel.
After the rhizome is divided into several segments, the cut is disinfected with brilliant green or sprinkled with wood ash.
If, during the division of the root, the links remain without leaves, do not rush to dispose of them - provided they are healthy, they will also sprout next season.
Features for different varieties
Bearded

Choose healthy plants for planting
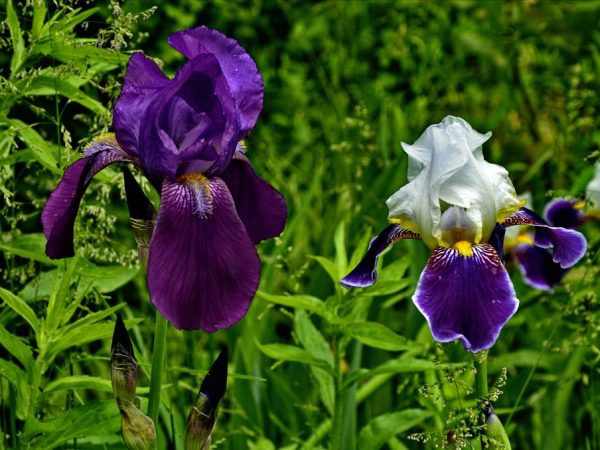
Some of the most externally interesting Irises. The contour line of their petals is covered with yellow bristles, which serve to attract insects for pollination.
Propagated mainly by dividing the bush, for which part of the overgrown green mass, together with the rhizome, is dug up with a shovel.
After that, the segments are disassembled either by pulling them out by hand, or with the help of garden tools.
It should be borne in mind that each such division must have at least one one-year-old link and leaves.
The more the latter, the better - the likelihood of the formation of a flower bud for the next season increases.
Additionally, it is necessary to trim the leaves by about ⅔ of the entire length and remove the peduncles, if any. Also, the cut is inspected for the presence of soft areas, which are cut out with a sharp knife. Subsequently, the seed is treated in an aqueous solution of potassium permanganate and dried for a couple of days in partial shade.
Siberian
The fundamental factors in transplanting Siberian Irises are their requirements regarding the growing area.
- They feel comfortable in light shade near trees and bushes.
- They love water, however, special waterlogging of the soil can lead to death. They are characterized by a powerful underground part, reaching a length of half a meter and serving as a pump for obtaining liquid.
- They do not need to be tied up due to the elastic trunk, due to which it is permissible to place the plant in areas unprotected from the wind.
In one place, flowers can exist for up to 10 years. A transplant is required subject to thickening. It is also carried out by dividing the bush, each segment of which should be placed at a sufficient distance from each other.
Additionally, rotted compost is introduced into the hole, and the substrate itself is improved - it is made looser and the level of acidity normalized.
With a small number of divisions, their temporary germination in separate pots is allowed, thus the plant is protected from freezing. If necessary, the seedlings are brought into the room.
Bulbous
In addition to Irises, the underground part of which is represented by rhizomes, other varieties of this plant are also cultivated - xyphyums, junoes, iridodictiums. The roots of all three are in the form of bulbs.
Without a transplant, the bushes feel comfortable for 3-4 years with the condition of not too active growth in breadth.
In terms of the process technology, the chronology is identical to the standard one: the mother bush is divided by means of a garden fork and the segments are moved to the selected area.
Transplant rules
If you follow the planting time and its rules, next year the delenka is guaranteed to transform into a full-fledged, richly flowering bush. Additionally, a number of features of the cultivated variety should be taken into account.
Plant preparation

The bush must be divided into plots
You can transplant the Iris to a new place only after its leaves acquire a yellowish tint.
Some experienced gardeners sign the specimens that have been divided with a marker to avoid mistakes during the process.
In the fall, before the events, the bush is not watered for 2-3 weeks. You should also refrain from fertilizing. The rhizome is removed from the substrate using a garden pitchfork very carefully, pre-dug in the plant at a distance of 25 cm from the base.
Then they take it out of the ground, carefully shake off the rest of the soil and leave it to dry. Only after that it is allowed to separate into divisions.
Additionally, the seed is treated with a fungicide or a weak solution of potassium permanganate in order to stimulate growth.When using the latter, the exposure time in the product is 20-30 minutes, the purchased composition is used according to the instructions on the package.
The leaf blades are cut, leaving ⅓ of the entire length so that they visually resemble a roof slope. It is not recommended to completely eliminate them, because even in autumn, the process of photosynthesis takes place in them.
Soil preparation
Ideal for placing flowers in a flower bed that is well lit until noon. It will be nice if in the selected area the snow melts first and it is not exposed to gusts of wind.
Under the condition of heavy soil, before digging it, it is recommended to scatter a small amount of river sand over the surface, but if the substrate is too light, then, on the contrary, clay is added to it.
Will gratefully respond to pre-transplanting in moderate doses of superphosphates and potassium-based fertilizers.
Top dressing with nitrogen content is suitable exclusively for spring, in the autumn it is strictly forbidden to apply them, because they contribute to the growth of green mass and activate internal processes.
As a result, the plant will not have time to adapt to cold weather and will weaken.
Ideally, site preparation should be completed one week before planting. During this period, the soil is watered abundantly several times.
Rhizome division
In the process, it is recommended to use a sharp knife. Otherwise, there is a risk of incorrectly breaking the base and damaging the processes.
When dividing, be sure to leave at least one fan of leaves and several young buds on each segment. The root length should be no more than 10 cm.
Especially long ones are shortened due to the fact that they will interfere with the transplant process. The incision site is disinfected with ash or crushed activated carbon.
Landing in the ground
- In the middle of the planting pit (up to 12 cm in diameter), a small mound is formed.
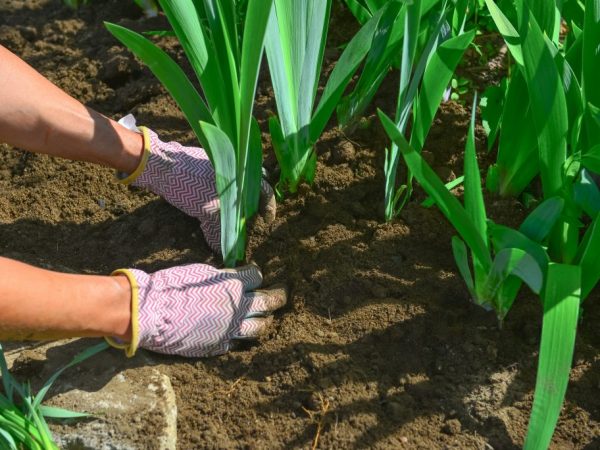
- In the center, a prepared cut is placed so that the roots go down the mound, do not get tangled and do not look up.
- The well is covered with a substrate. The neck of the flower, like the upper part of the rhizome, should be above the surface. Do not forget that the earth tends to settle over time.
- Water in moderation.
For mass planting, the distance between them is determined depending on the variety. The gap is usually in the range of 10-35 cm.If the gardener is not going to touch the Iris for a long time, the step is increased to 0.5 m.
Follow-up care
Caring for planted flowers is not very difficult. If the weather is good in autumn and there is no precipitation, the seedlings are watered 3-4 days after they are embedded in the substrate.
It is also required to systematically weed the weeds from the near-stem space. The manipulations are performed extremely delicately due to the arising risk of damaging the roots located close to the surface.
If desired, you can mulch the soil in the event of a severe winter forecast (for Siberia, the requirement is mandatory). In the spring, this layer is removed as soon as the snow melts.
If you follow all the intricacies of transplanting Irises, already at the beginning of spring they will begin to actively gain green mass and will be the first to please with abundant flowering.

