How to dry garlic properly
Garlic is one of the popular dietary supplements that can maintain its medicinal properties for a long time. There are several ways to prepare this seasoning, but before you dry the garlic, you need to follow the rules of cleaning and prepare the storage area.

Dry garlic properly
Otherwise, the taste of the cloves will be lost as a result of decay. To avoid this, you must adhere to a certain algorithm of actions.
Bulb harvesting rules
Digging up the crop is an integral part of preparing the plants for storage. Improper collection of fruits can affect the integrity of the heads, which will cause rapid damage to the bulbs.
- The main indicator of crop maturity is the foliage of the plant. As soon as most of it has turned yellow, you can dig out the garlic.
- Also, to determine the ripening of the bulbs, one arrow is left in the garden. The appearance of seeds indicates the readiness of the variety.
- Species that are planted for the winter are usually dug out closer to August. Spring varieties can mature until mid-autumn.
The plants should be dug out as carefully as possible. First, the onion is dug in, after which the garlic is pulled out of the soil by the base of the stem. After harvesting the garlic, the soil should be dug up and planted with green manure. If this is not done, then the soil will lose many nutrients.
How to prepare crops for drying
Before drying the garlic after harvesting, it should be subjected to primary processing. The heads should be cleaned from the ground by hand and dried within a week. After that, the arrows and roots are removed with a knife or pruner, leaving a stem 2 cm long.
There are also several rules that must be followed during initial processing. These include:
- Preservation of foliage after digging. This will allow the bulb to gain the maximum of nutrients after drying.
- Neatness in relation to the harvest. It is not recommended to knock heads together to shake off the ground. Any mechanical damage to the husk affects the shelf life of the bulbs.
- Lack of moisture. After digging up, you cannot wash the garlic - this will lead to rotting of the bulbs.
These recommendations will help you prepare your crop correctly. When cleaning the heads, you can remove the top layer of husk. There are several ways to dry garlic. Their choice depends on the means at hand and the amount of the crop.
Drying outside
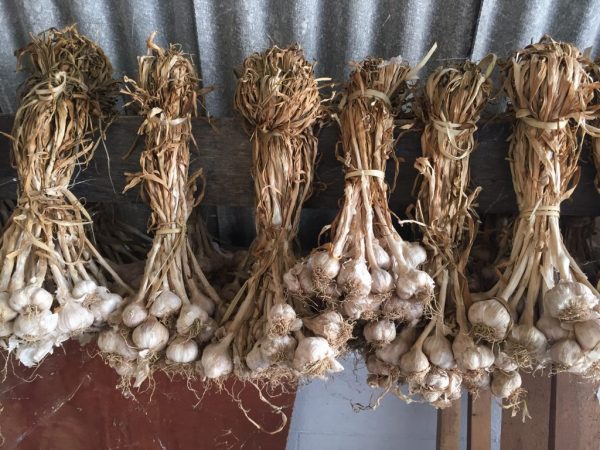
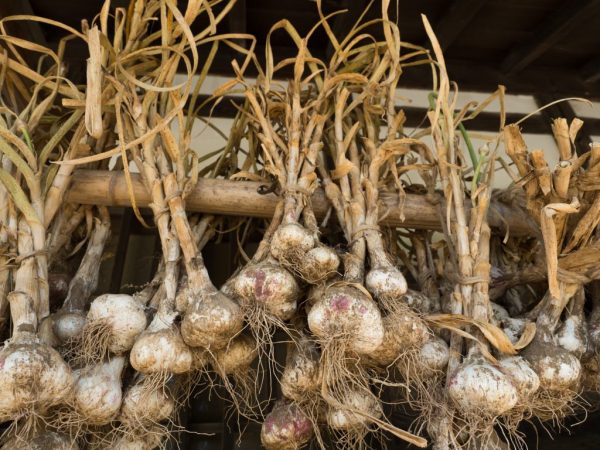
This type of heat treatment is the most popular because it does not require additional materials. After primary processing, the crop should be dried outside, weather permitting. The drying process can be carried out only during the day, it is better to hide the garlic at night, since the amount of precipitation increases at night.
Drying of garlic lasts from three to five days. This method is also welcomed by farmers due to the increased resistance of the fruit to various diseases.However, you need to watch out for the sun's rays - under direct ultraviolet light, the heads can get burned.
Also, experts advise not to remove excess foliage from the stem. This will keep the cloves from drying out and increase the beneficial properties of the bulb.
Drying indoors
This method of drying the crop for the winter is used if the weather does not allow leaving the bulbs outside. Rooms with good air circulation are suitable for drying.
It is also desirable that the room be darkened and the air moderately humid. For these purposes, you can use a balcony or attic.
Drying in the oven

Dried not only in the fresh air
In the modern world, an oven is used to dry the crop in an apartment - a dryer. Before drying the garlic, it should be completely cleaned of excess foliage and roots, and then rinsed thoroughly under running water.
The teeth are cut into plates a couple of millimeters thick. The slicing is laid out on a baking sheet, having previously covered it with parchment or foil. The plates are folded in one row. The oven temperature should not exceed 50 degrees, otherwise the slices may burn and acquire an unpleasant brown tint. After drying, the garlic can be ground into granules and stored as a powder. A similar method is used in industrial production, since it is convenient and practical to store the onion in powder form.
Drying in an electric dryer
This method of drying garlic at home is considered the easiest one because it minimizes the risk of spoiling the harvest. To dry garlic in an electric dryer, you should carefully peel it and wash it for a while under running water. After that, each clove is cut into two or three parts and placed in special containers of an electric dryer.
The slices should be laid out with cuts up. This will allow the bulbs to dry faster. With this method, you can dry the crop in ten hours. This method is the least time consuming and allows you to dry a large amount of the crop. After drying, the wedges can be ground and stored as a powder.
Home storage
Before you dry your homemade garlic, you should prepare the storage area during the winter. It will depend on him how long the harvest will last. Dried garlic can be stored for several months in an apartment or special storage areas. However, different additional materials should be used for the strength of the teeth. The most effective are:
- kitchen salt;
- paraffin;
- onion peel;
- a mixture of oil and iodine.
Salt
Table salt is placed on the bottom of the jar, after which the container is covered with garlic. One more layer of salt should be poured on top and a nylon cloth should be pulled over the neck of the jar. In this form, the bulbs are stored for several months. You can also add a handful of wheat flour. These ingredients remove excess moisture and help prevent decay. In addition, they protect the cloves from pests and diseases.
Paraffin
When using paraffin wax, each head must be dipped in liquid wax. The extra protective shell allows the bulbs to retain their strength and juiciness. Also, paraffin will not allow excess moisture to affect the cloves.
Oil solution
To prepare an oil composition, you should dilute 25 drops of iodine in 1 liter of oil. Dried homemade garlic is treated with such a solution and placed in wooden boxes. Then they should be placed in a dark and cool place.
Alternatively, you can store the wedges in the refrigerator. For this, peeled dried garlic is placed in a jar and poured with oil. However, its taste changes.
Onion skins can be used to reduce moisture levels. To do this, mix the slices with the husk and put in a linen bag. This storage method is convenient for apartment owners in winter.
Dried granulated garlic is best stored in paper bags.In this case, the powder is not moistened and does not lose its characteristic odor.
Conclusion
For long-term storage of the crop, the bulbs must be dried. However, before drying homemade garlic, you should do a number of preparatory steps, know how and in what conditions this is done.
After proper processing, this type of plant can lie for several months. Thanks to additional ingredients such as salt and oil, the cloves will retain their strength and will not be susceptible to disease.


